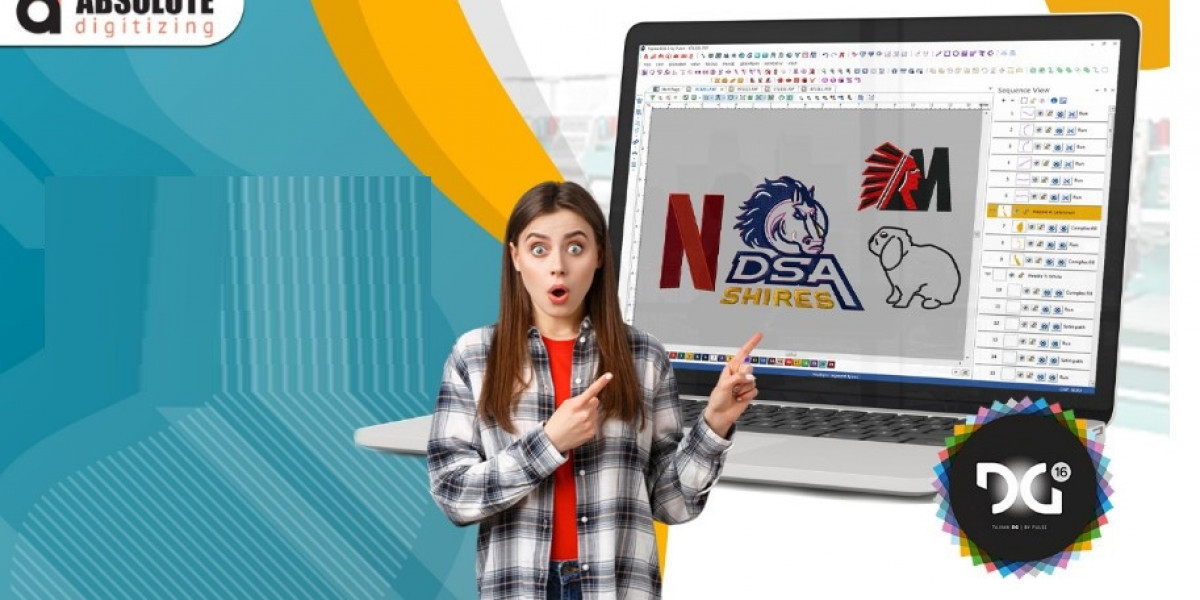

Have you ever had a perfect logo or image but couldn't use it for embroidery? That's because an image such as JPG or PNG isn't an embroidery file. An embroidery machine needs detailed stitch instructions to reproduce the artwork on fabric.
To convert images into PXF embroidery files, the artwork first needs to be prepared and digitized. During this process, visual elements are turned into embroidery objects with stitch types, density, direction, underlay, and sequencing. The finished PXF file can then be edited or prepared for embroidery production using compatible software.
Whether you're preparing a business logo, custom artwork, or a personal design, understanding this conversion process can help you get better embroidery results.
What Is a PXF Embroidery File?
PXF is an embroidery design format that stores editable embroidery information. Unlike a standard image file, a PXF design can contain individual embroidery objects and their stitch properties.
Depending on the software and workflow, a PXF file can preserve information such as:
- Stitch types
- Stitch density
- Stitch direction
- Underlay settings
- Thread colors
- Object properties
- Stitch sequence
- Design dimensions
This makes PXF useful when a design needs further editing or adjustments during the digitizing process.
Why Convert an Image to PXF?
An image is designed to be viewed, while an embroidery file is designed to be stitched.
For example, a PNG logo may contain smooth curves, shadows, tiny text, and detailed artwork. An embroidery machine cannot simply read those pixels and know where to place thread.
Converting the artwork into an editable embroidery format allows the design to be structured specifically for stitching.
Image-to-PXF conversion can be useful for:
- Company logos
- Apparel branding
- Custom patches
- Jacket designs
- Promotional products
- Personalized clothing
- Embroidery samples
- Production-ready artwork
What Images Can Be Converted to PXF?
Several common image formats can be used as starting artwork.
JPG Images
JPG files are widely used and can work well when the image is high resolution and clear.
However, compression may create blurry edges or unwanted artifacts. Cleaning the artwork before digitizing can improve the final result.
PNG Images
PNG files are often useful for logos and graphics, especially when they have a transparent background.
A clean PNG can make it easier to identify individual shapes and colors.
Vector Artwork
Vector formats can provide an even better starting point for many logos because shapes remain sharp when edited or scaled.
Regardless of the source format, the artwork still needs to be converted into actual embroidery objects and stitches.
How to Convert Images into PXF Embroidery Files
The conversion process involves several important steps. Simply importing an image and clicking "save as PXF" does not create a properly digitized embroidery design.
1. Select a High-Quality Image
Start with the best artwork available.
A sharp, high-resolution image makes it easier to identify edges, shapes, and colors. Avoid using screenshots or heavily compressed images when possible.
Before beginning, check:
- Image resolution
- Background
- Color count
- Small details
- Text readability
- Overall design complexity
2. Clean and Prepare the Artwork
The artwork may need some preparation before digitizing.
Remove unnecessary backgrounds, fix rough edges, and simplify elements that are too small for embroidery.
For example, a thin line that looks obvious on a computer screen may be too narrow to reproduce reliably with thread.
3. Separate the Design Into Objects
The image needs to be broken into logical embroidery sections.
A three-color logo might contain:
- One object for the main lettering
- One object for an outline
- One object for a background shape
Separating elements makes it easier to control stitch types, colors, density, and sequence.
4. Choose the Right Stitch Types
Different artwork shapes require different embroidery stitches.
Satin Stitch
Satin stitches are often suitable for lettering, borders, and narrow shapes. They create a smooth finish when properly digitized.
Fill Stitch
Fill stitches work well for larger areas that need thread coverage.
Running Stitch
Running stitches are useful for fine outlines and narrow details.
Choosing stitches based on the shape rather than using one stitch type everywhere can make the finished design look much cleaner.
5. Set Stitch Direction
Stitch direction affects both appearance and how the fabric responds during embroidery.
Changing the direction between different objects can add visual texture and help control the way thread pulls on the fabric.
Poor stitch direction may contribute to distortion or uneven-looking surfaces.
6. Add Underlay
Underlay stitches provide a foundation underneath the visible embroidery.
They can help stabilize fabric and improve the appearance of top stitches. The right underlay depends on the object, fabric, size, and stitch type.
7. Adjust Stitch Density
Density controls how closely stitches are placed.
Too much density can result in:
- Heavy embroidery
- Excess thread
- Fabric puckering
- Needle or thread problems
Too little density may produce poor coverage and allow the fabric to show through.
The goal is balanced coverage rather than simply adding more stitches.
8. Set the Stitch Sequence
The order in which objects are embroidered matters.
A well-planned sequence can reduce unnecessary jumps, trims, and color changes. It can also help different parts of the design line up correctly.
9. Check the Design Size
Before exporting, confirm the intended physical dimensions.
A logo designed for a jacket back may not work at the same size on a small shirt pocket. Small applications often require special attention to lettering and fine details.
10. Save or Export as PXF
After the artwork has been digitized and reviewed, save the editable embroidery design in PXF format using compatible embroidery software.
Check that the file contains the intended objects, colors, stitch settings, and dimensions before moving on to production.
PXF vs. JPG: What's the Difference?
Understanding the difference between these formats is important.
| Feature | JPG | PXF |
|---|---|---|
| Type | Raster image | Embroidery design format |
| Main purpose | Viewing graphics | Editing embroidery |
| Contains stitches | No | Yes |
| Thread settings | No | Can contain them |
| Stitch direction | No | Can contain it |
| Embroidery objects | No | Yes |
| Suitable for direct embroidery | No | Depends on compatible workflow/software |
A JPG tells you what an image looks like. A PXF embroidery file contains structured information about how the artwork is represented as embroidery.
Common Problems When Converting Images to PXF
Image conversion can become difficult when the original artwork isn't suitable for embroidery.
Too Much Detail
Highly detailed artwork may contain features that are too small to stitch.
Simplifying the design can help preserve its main visual identity.
Tiny Text
Small lettering is one of the most challenging parts of embroidery.
A font that looks clear on a screen may become difficult to read after stitching. Text may need to be enlarged, simplified, or specially digitized.
Too Many Colors
An image may contain dozens of subtle shades, while an embroidered design may use only a limited number of thread colors.
Reducing unnecessary color variations can make the design more practical for embroidery.
Incorrect Density
Using excessive density doesn't automatically improve quality. In many cases, it can create a heavy, stiff design and increase production problems.
Poor Stitch Sequence
Incorrect sequencing can cause unnecessary jumps, trims, and registration issues.
Tips for Better Image-to-PXF Conversion
Want a cleaner result? Keep these tips in mind:
- Start with high-resolution artwork.
- Use vector artwork when available.
- Remove unnecessary details.
- Keep important shapes clear.
- Avoid extremely small lettering.
- Select stitch types based on object shapes.
- Use appropriate underlay.
- Balance stitch density.
- Consider the fabric before digitizing.
- Check the final stitch sequence.
- Test the design before bulk production.
These small decisions can have a major impact on the final embroidered product.
Do You Need Professional Embroidery Digitizing?
If you have simple artwork and experience with embroidery software, you may be able to create a PXF file yourself.
However, complex artwork can require much more attention. A professional digitizer can evaluate the design from an embroidery perspective rather than simply tracing its appearance.
Professional digitizing may be useful when:
- The logo contains small lettering.
- The artwork has complex shapes.
- Multiple sizes are required.
- The design will be used for commercial production.
- You need consistent stitch quality.
- You're experiencing thread breaks or puckering.
- The design must work on different fabrics.
Absolute Digitizing can help prepare artwork for embroidery by considering stitch structure, design size, fabric behavior, and production requirements.
How to Test Your PXF Embroidery Design
Never assume that a design will stitch perfectly just because it looks good on your monitor.
A test stitch is one of the best ways to identify potential problems.
Follow these steps:
- Confirm the final design dimensions.
- Load the design into your embroidery workflow.
- Use the intended fabric and stabilizer.
- Stitch a sample.
- Inspect the lettering and fine details.
- Look for gaps, puckering, or excessive thread.
- Check thread changes and trims.
- Make adjustments if necessary.
- Run another sample when needed.
Testing is especially important for logos that will be embroidered on multiple garments.
When Should You Re-Digitize an Image?
Sometimes simply adjusting an existing design isn't enough.
Re-digitizing may be a better choice when the design needs:
- A significantly different size
- Smaller lettering
- Larger lettering
- A different fabric application
- Hat or cap embroidery
- Better stitch coverage
- Reduced stitch count
- Improved registration
A design created specifically for its intended size and fabric will often produce more reliable results than one that has been heavily modified from another version.
Frequently Asked Questions
Can I convert a JPG directly into a PXF file?
A JPG can be used as source artwork, but it needs to be digitized into embroidery objects and stitches before it becomes a useful PXF design.
Is PXF an embroidery machine format?
PXF is an editable embroidery design format used within compatible embroidery software workflows. The final machine format may depend on the specific embroidery machine being used.
Can PNG images be converted into PXF?
Yes. A PNG can be used as source artwork for creating a PXF embroidery design. Transparent-background PNG files can be particularly useful for logos.
How long does image-to-PXF conversion take?
The time depends on the artwork's complexity, size, number of colors, lettering, and required stitch quality. Simple logos generally require less work than detailed designs.
Can I convert a detailed logo into PXF?
Yes, but highly detailed logos may need simplification. Tiny elements, fine lines, and small text may not translate well into embroidery without modification.
Conclusion
To convert images into PXF embroidery files, you need to think beyond the original picture. A successful embroidery design requires artwork preparation, object separation, suitable stitch types, proper density, underlay, stitch direction, and careful sequencing.
A clean source image gives you a strong starting point, but thoughtful digitizing determines how well the design actually stitches.
Whether you're preparing a company logo, custom artwork, patch, or garment design, always consider the final size, fabric, and embroidery application. When the design is complex or intended for professional production, expert digitizing can help achieve a cleaner and more dependable result.